
Sleek and stylish, the Lomo’Instant Square Glass Camera is available in a new timeless black design with silver accents. An excellent all-rounder, the foldable bellows design provides a portable analogue aesthetic but trust us, you’ll struggle to put it away! It's cool to be square.


Explore Our Films


No matter if you are looking for 35 mm, 120 Medium Format, 110 or Instant Film, there’s a roll waiting for you!
Some Interesting Things
What are you looking for?
If you’ve been around for a while: join the conversation in our Shoutbox, take a look at the ongoing Competitions or browse through all Homes.
Lomo School

Forget about stuffy classrooms with chewing gum on the seats, welcome to the most exciting school you’ve ever been to! Learn everything from the analogue basics to advanced experimental techniques with these photography courses.
Lomography Store Locator

Whether on holiday or at home, Lomography is never far away. Wherever you are in the world, find your closest Lomography stockist and explore what analogue goodies they supply.
-
Shop News
Lomo LC-A+ 35 mm Film Camera

Conquer the world one iconic 35mm photo at a time with the camera that started it all, the Lomo LC-A+!
-
Capturing Women's Football on Film with Raiyan Rafiq and Harriet Duffy
written by rocket_fries0036 on 2024-04-17 #gear #culture #people
Raiyan and Harriet showcase their love for the beautiful game with their intimate and emotional snapshots of women's football on film, documenting scenes from the Euros, World Cup and Barclays Women’s Super League.
1 5 Share Tweet -
What are the different photographic film formats?

The three main types of film format are 35 mm, medium format and large format. More unusual formats also exist such as 110 and 127.
Most Popular Cities
- London
- Berlin
- Bangkok
- Paris
- Moscow
- Barcelona
- New York
- Tokyo
- Vienna
- Madrid
- Singapore
- Istanbul
- Hong Kong
- Saint-Petersburg
- Amsterdam
- Taipei
- San Francisco
- Bandung
- Prague
- hong kong
- Rio de Janeiro
- Hamburg
- Toronto
- kuala lumpur
- jakarta
- Los Angeles, CA
- Rome
- Manila
- Buenos Aires
- Taipei City
- Melbourne
- Rostov-on-Don
- Budapest
- Seoul
- Beijing
- Sydney
- Manchester
- São Paulo
- Shanghai
- Lisbon
- Milano
- Honolulu
- Singapore
- Como
- Helsinki
- Vaasa
- Porto
- Chicago
- Kuala Lumpur
- Landshut
-
Lomomatic 110: First Impressions with Dana T.
written by alexa_alexiades on 2024-04-24 #gear #people
Film-enthusiast Dana T. has enamored us with her 110 photography for quite some time now, so it is no surprise that she also impressed us with her results from the Lomomatic 110. Today she has returned to the magazine to share some thoughts on this brand new pocket camera!
1 11 Share Tweet -
What is a multiple exposure?

Multiple exposures (or MX) are photographs in which two or more images are superimposed in a single frame, and they’re super easy to create using your analogue camera. Set an image of a train against a field of flowers, or prop your friend’s face against an image of a city skyline to create enchanting and surreal images.
-
Kelvin Fadillah Wahyu Shoots with the Lomo LC-A and Lomography Film
written by adi_totp on 2024-04-13 #gear #people #places
Bandung-based freelance photographer Kelvin Fadillah Wahyu recently tried our Lomo LC-A along with our Lomography Color Negative ISO 400 and LomoChrome Purple Pétillant film for two creative photo shoots. Check out the photos and read about his impressions in this interview!
1 Share Tweet -
Shop News
Get Inspired by the the Lomo’Instant Automat Vivian Ho Edition

Forget the ordinary, make the world extraordinary with this special edition Lomo’Instant Automat Camera with lenses featuring a colorful illustration by Hong Kong artist, Vivian Ho! Estimated to ship-out in December 2022 for the EU and the US!
-
Didi Satriadi Explores Medium Format with LomoChrome Turquoise and Lomography Color Negative 120 film
written by adi_totp on 2024-04-22 #gear #people
Indonesian photographer Didi Satriadi recently tried out our LomoChrome Turquoise 120 and Lomography Color Negative 120 ISO 800 film. Read his interview and check out his photos here!
1 3 Share Tweet Ongoing & Upcoming Events
- Capturing The Moment
- Charlie Phillips’ How Great Thou Art – 50 Years of African Caribbean Funerals in London
- Transformations: American Photographs from the 1970s
- David Seidner: Fragments, 1977–99
- ICP at 50
- First Came a Friendship: Sidney B. Felsen and the Artists at Gemini G.E.L.
- Ellen Graham: Unscripted
- I’m a thousand different people–Every one is real
- Irving Penn
- Francesca Woodman and Julia Margaret Cameron: Portraits to Dream In
-
Shop News
Four times the fun in every frame

Colorful and charismatic, this light-hearted beauty has four wide-angle lenses and shoots sequential images onto a single frame of film.
-
Multiple Exposures on LomoChrome Metropolis 120 Film by Architect Aitor Estévez
written by ludovicazen on 2024-04-15 #gear
Architectural photographer Aitor Estévez created these wonderful multiple exposures on our LomoChrome Metropolis 120 film. See the photos and read about his process here!
7 Share Tweet
Our great community members have uploaded 16,735,587 photos so far. Browse all of them or search by tags, countries, cities, cameras or films. Be a part of it and add your photos as well!


More Interesting Things
-
Magda Kuca and Laertis Create a Trippy Music Video With the LomoKino
2024-04-15 #news #videos
UK-based visual artist Magda Kuca used the Lomokino to create this fantastic music video for musician Laertis, inspired by an infamous LSD-fuelled bike ride taken by Albert Hofmann in 1943.
1 4 Share Tweet Most Popular Tags
- 35mm
- summer
- xpro
- kodak
- lomo
- lomography
- film
- friends
- x-pro
- city
- nature
- color
- beach
- lc-a
- b&w
- expired
- street
- fun
- travel
- people
- fuji
- winter
- cross
- lca
- sea
- redscale
- canon
- diana
- doubles
- trip
- analog
- fisheye
- bw
- sun
- spring
- double
- portrait
- party
- black
- holga
- white
- sky
- slide
- holiday
- night
- black and white
- water
- nikon
- japan
- blackandwhite
-
Event Recap: Diana F+ Workshop with Blue Moon Camera
written by alexa_alexiades on 2024-04-26 #gear #places #partners
On March 26th, 2024, a group of folks gathered at Blue Moon Camera & Machine in Portland, Oregon for a day filled with creativity and analogue image-making. For today's event recap, we've asked them to share some of their photos and takeaways from this workshop.
2 Share Tweet Most Popular Films
-
Making The Remarkable – An Interview with Film Photographer Andrew Contreras
written by sylvann on 2024-04-24 #culture #people #places
Why do you shoot film? For Andrew Contreras, analogue photography is a way to document future history and to turn a moment into something remarkable. We talk about this and more in our interview with the South Korea-based photographer.
3 Share Tweet -
Shop News
Drape the World in Glorious Silky Focus with the Daguerreotype Achromat 2.9/64 Art Lens!

Create rich textured backgrounds and wrap your world in luminous soft focus with the Daguerreotype Achromat 2.9/64 Art Lens!
-
Bryan Berryeater on Creating Beauty in the Mundane with the Diana F+
written by alexa_alexiades on 2024-04-20 #gear #people #places
Bryan Berryeater set out on a few bike rides around Portland, Oregon, accompanied by the Diana F+, along with some rolls of Lomography Color Negative 400, and Berlin Kino film. He joins us on Lomography Magazine to share his impressions and creative experimentations with the unique camera!
5 Share Tweet Ongoing Competitions
-
Yaotomi Camera Store in Osaka Revisits 120 Format With the Diana F+
written by kota_97 on 2024-04-14 #gear #places #partners
As part of our mission to save 120 film we invited our partners from Yaotomi in Osaka to shoot with the Diana F+ and share their experience with us. Check out their results and read their advice for other photographers using the Diana F+ for the first time.
2 7 Share Tweet -
Shop News
Lomo LC-Wide Camera

Capture the world in wonderfully wide-angle snap shots on 35mm film with the 17mm Minigon 1 Ultra-Wide-Angle lens and the Lomo LC-Wide!
-
Lushi Song Takes Us Behind the Scenes of the Chevalier Ballet in NYC ft. the Lomo LC-Wide
written by eloffreno on 2024-04-22 #gear #culture #people #places
Today, LomoAmigo Lushi Song is back, shifting gears from her usual wedding photography to share behind-the-scenes photos that she took of the ballerinas of the Chevalier Ballet Company in New York City.
3 8 Share Tweet -
What is the minimum distance to be from my subject when using a flash?
For most basic camera flashes a minimum distance of one meter, or approximately your arm’s length, should be enough to get a good exposure.
-
Shop News
Shoot ultra-vibrant photos with the premium Minigon XL glass lens

Compact, pocket-sized and robust. With the LC-A 120 medium format camera you can indulge in deep saturation, punchy contrast and shadowy vignettes. You´ll love the LC-A+s program exposure on medium format!
-
Event Recap: Diana F+ Workshop with Soho Photo Gallery
written by alexa_alexiades on 2024-04-10 #partners
For over a decade, Soho Photo Gallery has been hosting their Krappy Kamera competition, paying homage to plastic cameras and exhibiting extraordinary photographs made with lousy lenses. In true Lomography fashion, it has become our tradition to partner up with them in hosting a Diana F+ workshop.
3 6 Share Tweet -
Shop News
Capture More with the Naiad 15mm Art Lens!

An extraordinary ultra-wide-angle lens handcrafted specifically for the Neptune Convertible Art Lens System. Now with a free lens base for your Nikon or Canon (d)SLR camera!

Even More Interesting Things
-
The Minilab - Lovable Imperfections with the Diana F+
2024-04-23 #gear #news #partners
The Minilab are an independent processing lab in Northampton, UK. They recently tested out the Diana F+ camera and talked to us about their love of shooting in medium format.
3 Share Tweet -
Shop News
Bundle Up and Save!

On the look for a great deal? In need for the perfect gift? Not sure what film to get with your camera? Worry not and discover our budget friendly bundles including sweet discounts and freebies for many different products! Don´t miss a great deal and check them out now!
-
10 Golden Rules with Lydia Lutz and Lomography 120 Film
2024-04-27 #culture #people
Analogue enthusiast Lydia Lutz is back to give us her tips on staying creatively inspired and shares some of her latest photos using a mix of Lomography 120 film.
1 Share Tweet -
Shop News
A liquid-filled lens?

A 35 mm camera and liquid-filled lens that crafts extraordinary perforated panoramics. Go loopy with liquids, wild for the wetlook and crazy with colors!
-
Justino Blake’s Views From Lombok With Lomography Redscale Film
written by alexgray on 2024-04-18 #gear #people #places
In this interview we catch up with film photographer and perpetual traveler Justino Blake and he shares with us his atmospheric Lombok landscapes shot on Lomography Redscale film.
1 3 Share Tweet Open Positions at Lomography
- Wholesales Marketing Trainee
- Ruby on Rails Developer (m/f/x)
- Marketing Volontariat Austria, Germany & Switzerland (m/f/x - Internship)
- Wholesale Marketing Internship - DACH market (Germany, Austria, Switzerland)
- International Marketing Traineeship
- Graphic Design Intern (m/f/x)
- Finance & Administration Executive (Manila)
- E-Commerce & Shop Assistant – Manila
- Wholesale Marketing Internship - Australian Market
- Wholesale Marketing Internship - Indian Market
-
Shop News
Three Lenses in One – Nour Triplet v 2.0/64 Bokeh Control Art Lens

Ignite the legacy of a fascinating but forgotten scientist, Ibn al-Haytham, and become a master of light with this unique lens designed for spherical aberration control on full-frame mirrorless cameras. Shipping Live Now!
-
Finnish Photographer and Youtuber Ari Jaaksi Tests Our Lomomatic 110 Camera
written by lomocato on 2024-04-17 #gear #people
We sent our new Lomomatic 110 to Finland-based photographer and YouTuber Ari Jaaksi, who is here today to showcase his results and experiences! He created an honest review of the camera for his YouTube channel and shares his first 110 film shots with us.
11 Share Tweet -
Your Quick Guide to Analogue Photography

Don’t know your 35 mm from your 110? Never heard of medium format? Confused about cross-processing? This guide gives a brief overview of everything analogue and you’ll be an expert in no time! Get a head start with film photography with our downloadable 12-page PDF guide.
-
End of the World: Montauk on LomoChrome Turquoise 120 Film by James Katsipis
written by alexa_alexiades on 2024-04-25 #gear #people #places
Fine art photographer James Katsipis uses LomoChorome Turquoise 120 film to bring a whole new perspective to the landscapes of Montauk, depicting an alien-like parallel universe of the popular New York spot.
6 Share Tweet -
For how long is expired film still ok to use?

There’s no hard rule about how long a film will still be usable for past its expiry date. It all depends how the film has been stored before you shoot it. Film that has been kept in high temperatures, sunlight, or humidity will have degraded much faster than film that has been kept in cool, dark and dry conditions.
-
Shop News
Capture the bigger picture
Launch yourself into a new Lomographic experience with the astounding Sprocket Rocket, the world’s first panoramic wide-angle 35 mm camera dedicated to sprockets.
-
Synesthesia #13: Imagined Album Covers on Instant Film
written by rocket_fries0036 on 2024-04-19 #gear #culture #people
For this edition of Synesthesia, we highlight the community's instant photos with music selections including Asian Indie Rock, 80s Synth Pop, introspective jazz and world music hits.
1 10 Share Tweet Looking to Partner With Lomography and Customize a Camera, Film or Art Lens?
We have a proven track record of delivering corporate gifting and customization projects with leading companies across the Museum, Fashion, and Luxury sectors! Get in touch and let’s talk about your idea!
-
From the Archives: Instant Photography Tips & Creative Hacks
written by macasaett on 2024-04-26 #gear
Choose your own adventure by exploring this curated list of 12 articles that cover alternative experimentations and creative expression with instant photography!
3 Share Tweet
Trending Photos


Even More Interesting Things
Most Popular Cameras
-
Purposeful Thoughts and Personal Touches: Mia Amphlett’s Tips on Instant Photography
written by kylavillena on 2024-04-21 #gear #people
When we're hyper fixated on producing one picture after another, we can be faced with creative burnout. Luckily experimental instant photographer Mia Amphlett is here to share her tips on finding inspiration and meaning in one's works. Consider this a sign to remember why you do what you do!
2 7 Share Tweet -
Shop News
Lomomatic 110 Glass Lens Camera

The Lomomatic 110 is your compact companion for every adventure! Featuring a glass lens, automatic exposure, day and night aperture modes, controllable ISO settings and a flash, get ready to capture your memories in vibrant, super-sharp 110 frames, with a depth of field you’ve never seen on a 110 image ever before!
-
Making a Moment: Book Labyrinth by @pmonroe
written by alexgray on 2024-04-16 #making-a-moment
In this edition of Making a Moment, Lomographer @pmonroe shares one of the first photos he ever uploaded to his LomoHome, which he took while exploring an old bookshop in Busan.
7 Share Tweet -
Shop News
Get that authentic 80s disposable camera aesthetic

Capture every moment on 35 mm film, without breaking the bank & creating endless plastic waste, with reusable film cameras.
-
Summon Mnemosyne: Capture Memories with the Special Edition Lomo'Instant Automat Camera From Thai Artist, Jarb.
written by aomschll on 2024-04-10 #gear #people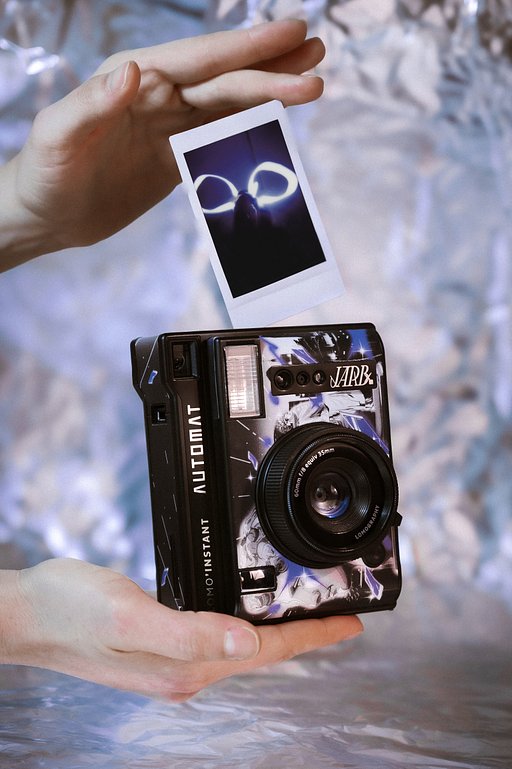
We have a chat with Jarb about his concept for this special edition Lomo'Instant Automat camera and discover his photos.
2 Share Tweet -
CARRTOONS on Discovering Analogue Photography and Documenting his NPR Tiny Desk Performance with the Lomo'Instant Camera
written by eloffreno on 2024-04-18 #gear #culture #people #videos
Ben Carr, also known as CARRTOONS, talks with us about finding inspiration in the lo-fi aesthetic, and his experience documenting his NPR Tiny Desk performance with the Lomo'Instant Automat Glass camera.
3 Share Tweet -
What are the best ingredients for film soup?

There are no strict rules when it comes to creating a film soup recipe. However, there are key liquid ingredients that most experienced film soup enthusiasts gravitate towards. Think of water, cola, juice, wine, beer, coffee, contact lens solution, vinegar, soy sauce, to name a few.
Most Popular Countries & Regions
- United States
- Germany
- United Kingdom
- Italy
- Spain
- Japan
- Russia
- France
- Malaysia
- Philippines
- Thailand
- Taiwan
- Brazil
- Canada
- Indonesia
- Singapore
- Netherlands
- Austria
- Portugal
- Turkey
- Australia
- Hong Kong
- China
- Ukraine
- Belgium
- Mexico
- Czech Republic
- Finland
- Poland
- Argentina
- Switzerland
- Chile
- Sweden
- Greece
- South Korea
- Slovakia
- New Zealand
- Denmark
- Hungary
- Ireland
- India
- Romania
- Belarus
- Iceland
- Peru
- Vietnam
- Bulgaria
- Norway
- Croatia
- Venezuela
-
Shop News
Film Photography Day Deals are On!

In celebration of Film Photography Day there are tons of exclusive discounts and fab freebies available so shop now and enjoy sweet savings before it’s too late!
-
Photo Gallery: Celebrating King’s Day with Orange Images from our Community
written by lomocato on 2024-04-27 #people #around-the-world
Today the Netherlands transforms into vibrant shades of orange to celebrate the king's birthday. We have decided to join in the celebration by embracing the color ourselves. Check out this gallery of orange-themed community photos!
1 Share Tweet -
Six Ways to Use the Lomomatic 110 Camera
written by sylvann on 2024-04-10 #gear
It’s time to get your hands on our newest film camera, the Lomomatic 110! Perhaps you’re asking yourself, what to capture with this tiny pocket camera? Here's a quick guide to get you inspired!
7 Share Tweet -
Jonathan Mok on His First Impressions of the Diana F+ and Love of 120 Film
written by eloffreno on 2024-04-11 #gear #culture #people #places
Jonathan Mok is a California-based photographer and creator with a knack for medium format photography. We knew the Diana F+ camera would be a perfect photographic companion for him!
1 6 Share Tweet -
How to make my own pinhole camera

There are many ways to make pinhole cameras, from cardboard boxes to beer cans! Here’s a quick and basic guide for you.
-
Get to Know Lomography's Full Instant Camera Line-Up
written by macasaett on 2024-04-12 #gear
Browse Lomography's complete line of instant cameras with formats ranging from mini, square, and wide.
2 Share Tweet